Creating campaigns
Creating a campaign
Once your newsletter is ready and your list of subscribers has been imported, you can combine them to create a communication campaign.
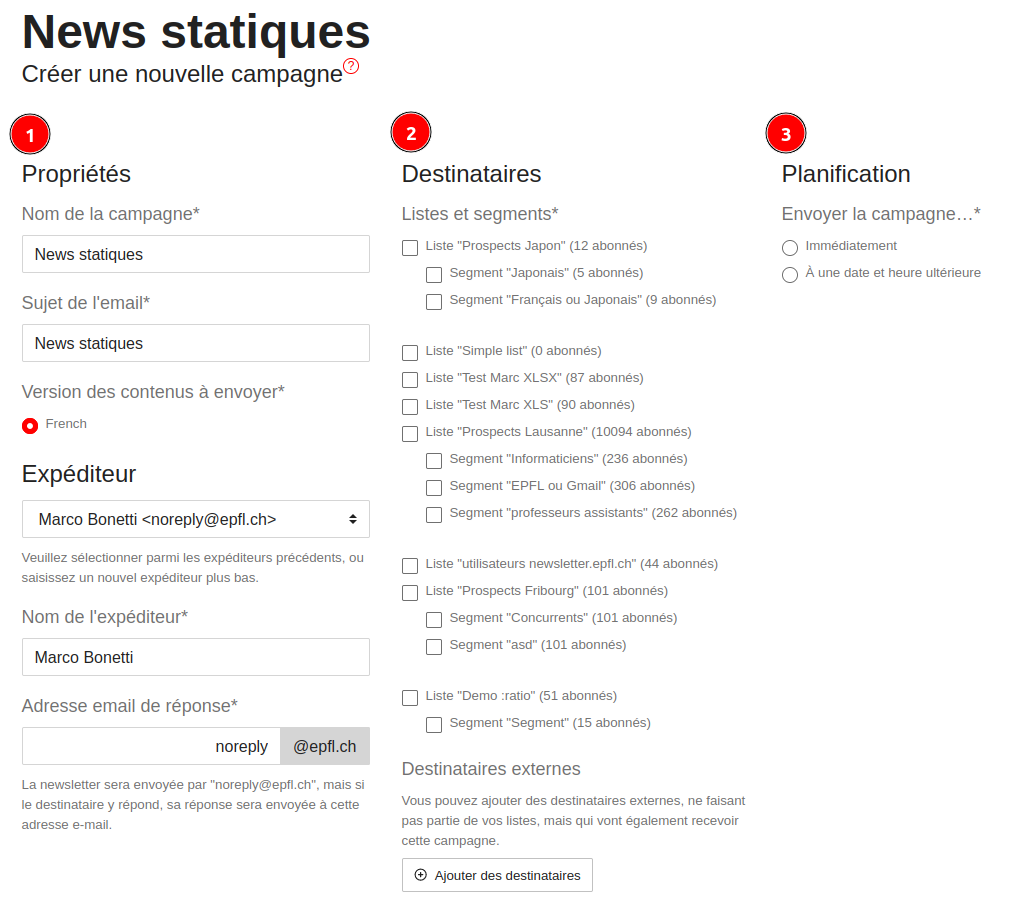
- Properties:
You can give your campaign a name. When you create a campaign, the Name field is automatically filled in with the newsletter’s title, but this can be changed.
Please note: This name is strictly internal and cannot be seen by your subscribers.
Email subject: The subject line of the email sent to subscribers.
Version of content to be sent: If your newsletter exists in several languages (English and French), use this field to choose which language to send.
Sender selection: you can select from a sender name / sender email used in any of your previous campaigns, or manually enter a sender name and email address.
Sender name: The name that will appear in the "From" field. By default this is the name of the user who created the campaign, but this can be changed to another name.
Sender’s email address: The email address (ending in “@epfl.ch”) used to send out the newsletter.
Please note: EPFL's SMTP server requires a generic "noreply@epfl.ch" email address in the "From" field. This is why the email address entered here is a "ReplyTo" address. In other words, if subscribers reply to the email they receive, the recipient will be the address you enter here.
- Recipients: Choose the lists or segments of subscribers who will receive this campaign.
External recipients: can add email addresses of recipients who are not part of you your lists selected above, but who will still receive this campaign.
- Scheduling: You can send the campaign out immediately or at a later date, in which case you can enter the exact date and time for your mailing.
Click the "Rreview and preview" button to preview what each recipient will see (you can e.g. check that the used variable names are correctly replaced with their names, for example). Also double-check the campaign parameters defined in the previous screen.
When you're happy with the parameters you can arm you campaign and send it out (or schedule it) using the "Confirm and send the campaign" button.
Once sent or scheduled for sending, you can track your campaign in the Campaigns page.
Related topics:
Was this page helpful?
Do you have a suggestion? Please log in to add a comment
Do you have a suggestion? Please log in to add a comment